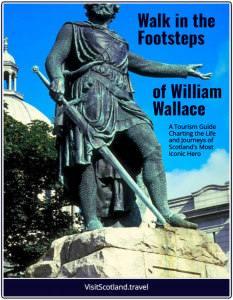
 On a misty autumn morning in 1297, a ragged Scottish army under William Wallace and Andrew Moray achieved one of the most astonishing upsets in medieval military history.
At Stirling Bridge they annihilated a larger, better-equipped English force led by John de Warenne, Earl of Surrey, and Hugh de Cressingham, Edward I’s treasurer in Scotland.
The victory shattered English control north of the Forth, made Wallace Guardian of Scotland, and turned an outlawed knight into a national legend.
The Strategic Prize: Stirling
Stirling sits where the River Forth narrows and becomes almost impossible to ford for many miles in either direction. In the 1290s the only way across was a narrow wooden bridge, barely wide enough for two horsemen abreast, just downstream from the medieval castle that still dominates the skyline. Whoever held the bridge controlled movement between southern and northern Scotland. Edward I had seized Stirling Castle the previous year; by summer 1297 the Scots had retaken it, and the English were marching north to recover the vital crossing.
The Opposing Forces
Scottish army
- Commanders: William Wallace and Andrew Moray (co-commanders in the name of King John Balliol)
- Strength: Estimates range 5,000–8,000 men, mostly infantry
- Composition: Dense schiltrons (circular spear formations) of common spearmen from Ayrshire, Lanarkshire, and the north-east; small numbers of archers; very few cavalry; almost no cavalry
- Morale: High after a summer of successful guerrilla raids
English army
- Commanders: John de Warenne, Earl of Surrey (nominal); Hugh de Cressingham (effective field commander)
- Strength: 8,000–12,000 infantry and perhaps 300–400 heavy cavalry (chroniclers give wildly varying figures)
- Composition: Welsh and northern English levies, some men-at-arms, a strong contingent of expensive mailed knights
- Morale: Over-confident; many knights regarded the Scots as peasant rebels
The Battle
The English arrived on 10 September and camped on the south bank. Surrey, elderly and unwell, sent two Dominican friars to offer pardon if the Scots would submit. Wallace’s famous reply, recorded by Blind Harry but rooted in contemporary sentiment, was: “Tell your people that we have not come here to seek peace, but are ready to fight to fight to defend ourselves and liberate our kingdom.”
The English plan was simple: cross the bridge at dawn and deploy on the north bank. The bridge, however, was the perfect bottleneck. Only a handful of men could cross at a time, and the causeway beyond curved sharply, forcing the vanguard into a cramped, boggy ground between the river and a steep slope (the area still called the “Loop” today).
Wallace and Moray waited on Abbey Craig (the hill now crowned by the National Wallace Monument), watching the English movements. They allowed the English vanguard—led by the impatient Cressingham—to begin crossing. Somewhere between 1,500 and 2,000 men, including many knights and Cressingham himself, had reached the north bank when the Scots struck.
At a pre-arranged signal the schiltrons charged downhill, sealed off the northern end of the bridge, and trapped the English vanguard in the loop of the river. Scottish light troops simultaneously seized the southern end of the bridge, cutting off retreat or reinforcement. The English on the north bank were massacred. Cressingham was killed (his skin reportedly flayed to make sword-belts), hundreds drowned trying to swim the Forth in armour, and the survivors who recrossed the bridge were so panicked they burned it behind them, isolating Surrey’s remaining army on the south side.
Surrey, seeing the disaster, ordered an immediate retreat to Berwick. The entire English baggage train, including the treasury chest, was abandoned and captured.
Casualties
English losses were catastrophic: perhaps 5,000 infantry and up to 100 men-at-arms killed. Scottish losses are unknown but believed to have been very light. Andrew Moray was mortally wounded (he died two months later), leaving Wallace as sole Guardian.
Aftermath and Legacy
- The victory destroyed Edward I’s administrative grip on Scotland for several years.
- Wallace was knighted and appointed Guardian of Scotland “in the name of the illustrious King John.”
- He led a retaliatory raid into northern England in late 1297, further cementing his reputation.
- The battle proved that disciplined spearmen in the right terrain could destroy feudal cavalry—a lesson later perfected by Robert the Bruce at Bannockburn.
- Stirling Bridge remains one of the classic “asymmetric” victories in military history, comparable to Courtrai (1302) or Morgarten (1315).
Visiting the Battlefield Today
The medieval wooden bridge is long gone, replaced in the 15th century by the stone Old Stirling Bridge a few hundred metres downstream. The actual fighting took place on the low ground immediately north of the old bridge site. Key spots:
- National Wallace Monument on Abbey Craig – panoramic views exactly where Wallace watched the English cross.
- The modern “Battle of Stirling Bridge” interpretive panels near the Old Bridge.
- Beheading Stone (traditional site of post-battle executions) and the Loop meadow.
Stand on Abbey Craig at sunrise, look down at the river gleaming below the castle rock, and it is still possible to feel the electric tension of that September morning when a despised “brigand” became the liberator of a nation.


